
February might seem like an odd time to think about bathroom upgrades, but for Kirkland homeowners planning major home improvements, it’s actually the perfect month to get your Toto toilets installation on the calendar.
Most people don’t realize that plumbing contractors in the Kirkland area start booking up their spring and summer schedules as early as January and February. If you’re considering a Toto toilets installation—whether it’s a standard close-coupled model, a Washlet bidet toilet, or one of the premium Neorest systems—timing your project correctly can save you money, reduce stress, and get you better availability with qualified installers.
The question isn’t whether you should upgrade to a Toto toilet (the benefits speak for themselves), but when to schedule installation for the best results. Kirkland’s unique climate patterns, contractor availability cycles, and seasonal home improvement trends all influence the optimal installation window.
In this guide, you’ll learn:
- Specific timeline considerations for different Toto toilet models
- What preparation steps you can take now for a spring installation
- Cost and availability factors that change throughout the year
Whether you’re replacing a failing toilet, upgrading to a Washlet for improved hygiene, or undertaking a complete bathroom remodel, understanding the installation timeline helps you make smarter decisions about when to proceed with your project.
Timeline Considerations for Different Toto Toilet Models
Not all Toto toilets installation require the same amount of time or preparation. The model you choose directly affects your installation timeline and when you need to begin planning.
Standard Toto Toilet Installation Timeline
Basic Toto toilet models, such as the Drake, Entrada, and Aquia IV series, follow a relatively straightforward installation process that most experienced plumbers can complete in a single service call.
Pre-Installation Phase (1-2 weeks):
- Initial consultation to assess your current bathroom setup
- Measurements of rough-in distance (typically 12 inches, but older homes may vary)
- Verification of water supply line compatibility
- Ordering the toilet if not in stock locally
Installation Day (2-4 hours):
- Removal of the existing toilet
- Inspection and replacement of the wax ring and flange if needed
- Installation of a new Toto toilet
- Connection to water supply
- Testing for leaks and proper flush operation
For these standard models, if you contact a plumber in February, you can realistically have your new Toto toilet installed by mid-March, assuming the model you want is available or can be ordered without significant delays.
Washlet Installation Requirements
Toto Washlet installations add complexity because these bidet toilet seats require electrical power in addition to water connections. This changes both the timeline and the preparation needed.
Pre-Installation Phase (2-4 weeks):
- Bathroom electrical assessment to determine if you have a GFCI outlet within reach
- Potential electrical work by an electrician to install an outlet near the toilet (if one doesn’t exist)
- Selection of a Washlet model compatible with your toilet bowl shape
Installation Day (3-5 hours, or multiple visits):
- If electrical work is required, the electrician’s visit comes first
- Installs the Washlet seat and connects the water supply
- Testing of all bidet functions (rear wash, front wash, dryer, heated seat)
The electrical component is what catches many homeowners off guard. If your bathroom doesn’t already have an outlet near the toilet (and most don’t), you’ll need an electrician to run power before the Washlet can be installed. This adds time and cost but is necessary for safe operation.
Planning in February for a Washlet installation gives you time to get the electrical work done in early spring and have everything ready for a seamless plumber visit to complete the Washlet installation.
Neorest Installation Complexity
Toto’s Neorest line represents the premium end of toilet technology—integrated toilet and bidet systems with advanced features like automatic open/close lids, self-cleaning wands, and powerful flushing systems. These units require the most planning and the longest installation timelines.
Pre-Installation Phase (4-6 weeks):
- Detailed bathroom assessment, including floor reinforcement needs
- Electrical work for GFCI outlet installation
- Verification of water pressure and supply line capacity
- Special order of Neorest unit (these aren’t typically stocked locally)
- Potential bathroom modifications for proper fit and clearances
Pre-Installation Plumbing Work (3-5 hours):
- Removal of the existing toilet
- Opening up the drywall to access the water line
- Moving the water stub-out location to accommodate Neorest specifications
- Waiting period for the drywall contractor to repair the wall
Installation Day (4-8 hours):
- Installation of any necessary mounting hardware
- Connection of the water supply with pressure verification
- Electrical connections and testing
Neorest models can take 3-4 weeks just to arrive after ordering, which is why February planning becomes especially valuable. Order in early February, schedule electrical work for late February or early March, and you’re looking at a late March or April installation date—right when you want the project done but before contractors get overwhelmed.
The complexity of Neorest installations also means you want a plumber with specific experience with these units. Not every plumber has installed the higher-end Toto systems, so vetting and selecting the right installer takes additional time that February planning accommodates.
Installing a Toto Toilet With Washlet
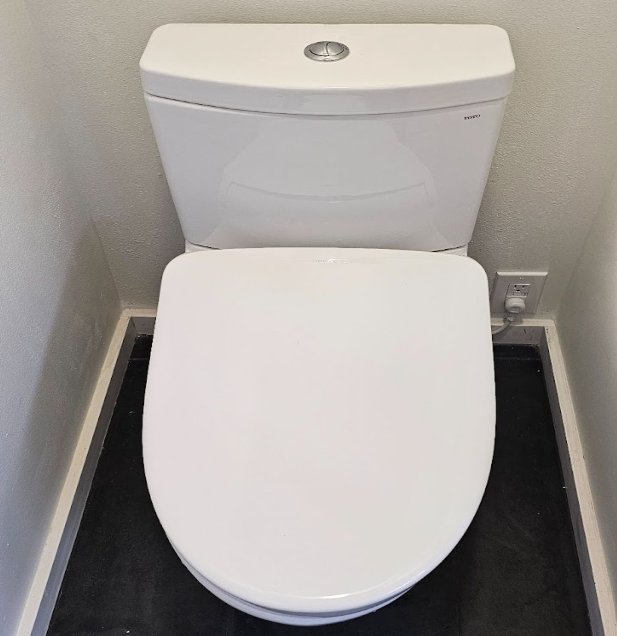
Many Toto models include a washlet seat. During installation, we turn the shut-off valve clockwise and disconnect the supply line. After removing the old toilet and scraping the wax ring from the mounting flange, we inspect the flange for cracks or loose mounting screws. If the flange shifts under pressure, we secure it before installing the new wax ring.
We position a new wax ring and lower the Toto bowl into place over the mounting bolts. Once the bowl rests flat on the floor, we tighten the floor bolts evenly to keep the base stable.
We attach the tank using the manufacturer’s tank bolts and gasket. We connect a new supply line from the shutoff valve to the fill valve shank and apply Teflon tape to the threaded connections as required.
If the model includes a washlet, we install the washlet mounting bracket and secure the seat to the bowl. We attach the washlet water supply hose to the shutoff valve, connect it to the washlet inlet port, and insert the washlet power cord into the electrical outlet.
We then turn the shut-off valve counterclockwise to allow the tank to fill. As the fill valve shuts off, we check the water level inside the tank. We flush the toilet multiple times and inspect the tank-to-bowl gasket, supply line connection, shut-off valve stem, and toilet base. The installation is complete when the toilet flushes properly, the handle moves smoothly, and there are no visible leaks at any connection point.
Confirming the Rough-In Measurement Before Scheduling
Before scheduling, we request the rough-in measurement. The rough-in measurement is taken from the finished wall surface to the center of the rear mounting bolt on the floor.
Most homes have a 12-inch rough-in, while some have a 10-inch or 14-inch rough-in. We ask homeowners to measure from the finished wall to the center of the bolt cap and send a clear photo of that measurement. Getting this measurement wrong can cause serious installation issues. If you order a 12-inch rough-in Toto toilet but your bathroom has a 10-inch rough-in, the tank will hit the wall, and the toilet won’t sit properly. If you order a 10-inch rough-in for a 12-inch space, you’ll have a gap between the tank and wall that looks unprofessional and leaves the toilet sitting too far forward.
Take the measurement carefully. Use a tape measure and measure from the wall surface (not the baseboard) straight to the center of the bolt. If you have tile or baseboards, measure from the actual wall surface behind them. Taking a photo of your measurement and the bolt location gives your plumber visual confirmation that the measurement is correct.
Checking the Shutoff Valve
We also request a photo of the shut-off valve before scheduling. On-site, we turn the shutoff valve clockwise to confirm that water flow stops completely before disconnecting the supply line. If the shut-off valve drips at the stem or fails to shut off the water, we remove the old valve and install a new one before reconnecting the supply line
Emergency vs. Planned Installation Pricing
One of the biggest cost factors that homeowners overlook is the difference between emergency toilet replacement and planned installation.
When your toilet fails completely—cracked tank, major leak, complete blockage—you’re in emergency mode. You need a plumber immediately, regardless of cost or timing. Emergency calls during peak season command the highest rates, often 50-100% higher than scheduled service rates. You also lose all negotiating power because you need the problem fixed now.
Planning your Toto toilets installation in February transforms what could be an expensive emergency into a controlled, scheduled upgrade. Even if your current toilet is showing signs of age (running constantly, weak flush, cracks forming), scheduling the replacement on your terms during the slow season costs dramatically less than waiting for complete failure during peak season.
This planned approach also lets you shop for the exact Toto model you want rather than accepting whatever the plumber has on their truck or can get quickly. Emergency replacements often mean settling for whatever’s available, which might not include the features you actually want.
Further Reading:
- New Year Bathroom and Kitchen Refresh Ideas From Kirkland Plumbers
- What Homeowners Ask About Plumbing Installations and Fixture Upgrades
Your Toto Toilet Installation Partner in Kirkland
Professional Toto toilet installation requires experience with these systems, particularly with advanced Washlet and Neorest models that integrate bidet functionality and electronic controls. The rough-in measurements must be exact, the shutoff valves must function properly, and, for powered models, the electrical work must meet code requirements.
Working with a plumber who understands Toto’s specific installation requirements makes the difference between a toilet that functions perfectly for years and one that develops leaks, wobbles, or doesn’t perform as expected. February gives you time to find an experienced installer rather than taking whoever is available during the summer rush.
The investment you’re making in a Toto toilet deserves an installation that matches its quality. Whether you’re upgrading to improve water efficiency, adding Washlet bidet functionality for enhanced hygiene, or installing a premium Neorest system, proper installation protects your investment and delivers the performance and reliability Toto toilets are known for.
Don’t let another month pass while your old toilet continues to waste water, flush weakly, or simply look dated in your bathroom. Take advantage of February’s strategic timing to plan your Toto toilets installation for spring completion at off-season pricing with your choice of qualified installers.
Contact us today to discuss your Toto toilets installation project, confirm your rough-in measurements, and secure your preferred installation date before the spring calendar fills up.
Contact 5 Corners Plumbing today to schedule your Toto toilets installation.